Showing posts with label Halloween. Show all posts

Friday, November 4, 2011

How to make a Giant Pumpkin

 Several years ago, I found a tutorial on how to make giant-sized jack-o-lanterns on a website called, Stolloween. Since I was enchanted with the huge pumpkins outside of Hagrid's cottage on Harry Potter, I knew that I had to try my hand at making my own jumbo pumpkin at some point. This October, I spotted a large fake pumpkin at Hobby Lobby for about $140.00 and was so shocked at the steep price that I went straight home and started figuring my own out. In the end, my pumpkin did not end up being as big as I wanted (which is probably a good thing since I really don't know how I am going to store it) but I still got a kick out of making something this large. Whether you are wanting to make a lasting decoration or a seasonal photo prop, hopefully this tutorial helps!

This is how I made it:
 I got the largest trash bag I could find and stuffed it full with newspaper, plastic bags and pages from magazines.

Then I knotted it up:

Next I used masking tape around the sides to create the ridges:

Once the general shape I wanted was formed, I used my paper mache paste recipe and added several layers of newspaper strips over the form. After I had as many layers as I wanted, I let it dry in the sun with a heavy can set in the center to help it keep its pumpkin form:
 (And I might add, what a fitting can to use for this project)

After it dried, I decided the ridges on my pumpkin were not as big as I wanted, so I crumpled up more newspaper and magazine pages, covered them with paste, and added them to the pumpkin:

After each crumpled up pasty piece was added, I glued it down with a strip of pasty newspaper so that it would hold in place. I did this until the entire pumpkin looked the way I liked.


Once all of my additions had dried, I mixed up paper clay and applied it in a thick layer over the top 3/4ths of the form:

Once it was hard/dry enough (several days later), I tipped it upside down on an empty bucket (so the stem wouldn't break) and cut a hole at the bottom...

...and took out all of the newspaper stuffing. This way it would be lighter and also would be able to dry at a faster rate:

Since all of the paper clay was so heavy, it sort of flattened the bottom of my pumpkin. To fix this, I cris-crossed the opening with more tape (so that my additions wouldn't fall inside) and added more crumpled pieces of newspaper and put more paper mache over them. After that, I added more paper clay to the bottom half of the pumpkin:

 Once that all dried fully, I sanded down my pumpkin and then painted it orange. I decided to use a sample-sized can of Gliddens Pumpkin Patch Orange from The Home Depot (since it is so inexpensive).  I finished by  using brown and green craft paint for the stem:

After my paint dried, I covered it with a marine/indoor/outdoor varnish like Jackie Hall suggested on The Paper Mache Recourse so that it would be able to withstand the elements on my front porch.

Now that it is starting to frost outside, many of our pumpkins have already turned to mush. However, our great big paper mache pumpkin is holding it's own and keeping our front porch festive despite the November chill! It was well worth the adventure.
Visit thecsiproject.com

Thursday, October 27, 2011

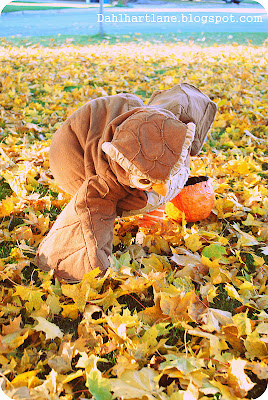
Owl costume

I finally finished my son's owl costume! Let me just say, designing a costume for a two-year-old is not my favorite thing, especially when that two-year-old tantrumed every time I attempted a fitting. But seeing my little man in it made it all worth it! Earlier I came across a little owl bank from Urban Outfitters on Pinterest and used it for my inspiration as I made my own flannel version.When it was all said and done, I think even my costume-hating son liked it since he proudly paraded it around for the rest of the night. I am now fully convinced that Halloween was made for mothers.


The leggings were made out of an old orange and white striped polo t-shirt that I died yellow and then made into matching pants. Here is how I made them.

Monday, October 24, 2011

Fox Costume

  Earlier this Summer, My oldest son told me that he wanted to be Batman for Halloween. Since I was hoping to do a woodland theme this year with my three boys, I made him a quick Batman (here) costume in hopes that it would satisfy his superhero needs. Since then, I have been trying to change his mind by having him watch old episodes of David the Gnome on Youtube and telling him that fox's get the most candy when trick-or-treating. Some would say that this is slightly dishonest, but since this is probably the last year that I can pull this trick, I feel completely justified! To make our fox costume come true, we died our fabric orange, made up a fox pattern and crossed our fingers in hopes for the best. I just finished it today and am thrilled. I was a little worried that I bullied him into it until I watched him race happily around for the rest of the day and hearing him say, "I want to wear this costume forever!" Needless to say, I am pleased as punch and would recommend poisoning molding your child's mind with the help of David the Gnome to anyone. Now just one owl costume to go and we'll be set!


Wednesday, October 19, 2011

Hedgehog Costume

Forgive me for putting his face make-up on after I took the pictures....how could I have forgotten that every self-respecting hedgehog has a little shiny nose and whiskers.
This year I decided that my littlest man HAD to be a hedgehog for Halloween. There is something about his cute little upturned nose and sticky-outy ears that remind me so much of the endearing hedgehog that I just couldn't picture it any other way. With a little (or a lot) of felt and some anti-pill fleece, his snugly Halloween outfit came to life. I am thrilled and luckily, he doesn't mind it to much either.

Hop over to Hideous! Dreadful! Stinky! to see a guest post I did where I showed a simple way of making the leggings for this costume out of a t-shirt. Also, stayed tuned for two more woodland-themed costumes! Hot dog!


Visit thecsiproject.com

Monday, October 17, 2011

My Round Little Pumpkin Costume

My sister was incredibly thoughtful to have snapped some photos of my little man in his costume. They still warm my heart every time I look at them.
Of all of the costumes that I have made, this round little pumpkin may very well be my favorite! Everything from the plump little cap to the striped suit underneath made my heart go pitter-pat. As luck would have it, my little boy started walking just the month before Halloween so I got to watch him toddle around in all of his glory! And best of all, I didn't have to worry about him hurting himself as he tripped around since the whole costume was one big puffball.


Personalized Halloween figurine

 In 2009 my oldest son was an adorable little clown for Halloween. I was so smitten by him in his clown duds that I decided to try my hand at sculpting an 11-inch figurine in his likeness. For nearly two years it sat on my shelf while I took care of more pressing matters (like having another baby). Last week I put some finishing touches on it and I am so glad to have it be part of our Halloween decor this year!  I like the idea of making personalized figurines of my boys as they grow over the years, but seeing as this one took forever to make, they might have to wait for when I don't have two kids in diapers. 

Friday, October 14, 2011

Candy Corn

I decided that I needed something to place on our table to help celebrate the festive month of Halloween. Since we are all about candy in this home, large candy corn bowl fillers were a logical choice. They are friendly and fun and keep us in the mood for Trick-or-Treating at the end of the month. Thankfully, they are also very easy and inexpensive to make. In fact, since they are made out of paper mache, they make recycling incredibly fun! Here is how I made ours:

First, take a section of your newspaper and fold a corner of the folded edge down into the middle of your newspaper at an angle:

 Fold over (or sorta roll) again while holding on to the top. By doing so, you create your candy corn point. The looser you fold, the more square and plump your candy corn is:

Fold over remaining corner:

Tape in place:

Turn form so that the point is facing down. Fold the raw edges into the cone:

Tape folds down:

Start taping over corners and holes:

Also, cover the base with multiple strips of masking tape until it is covered fully:

You don't have to cover the entire form with masking tape but make sure the holes are covered and the shape looks the way you like:

Cover your entire form with paper clay. I cover mine with about 1/4 an inch of paper clay:

After smoothing, let dry (if you don't have any sunshine, placing them in the oven on warm works like a charm). When they are all dry, paint in your candy corn colors (I forgot to show that part....woops). To get an antiqued look, add a couple drops of black paint to a Tablespoon of water and wipe on your form with a damp rag (I have now also used baby wipes and it worked great). Do sections at a time and blot off with another damp rag (or wipe). Continue to do this until you get the look you like.

After that antiquing drys, spray with a clear coating (like this)and your done!

LinkWithin

Related Posts Plugin for WordPress, Blogger...