

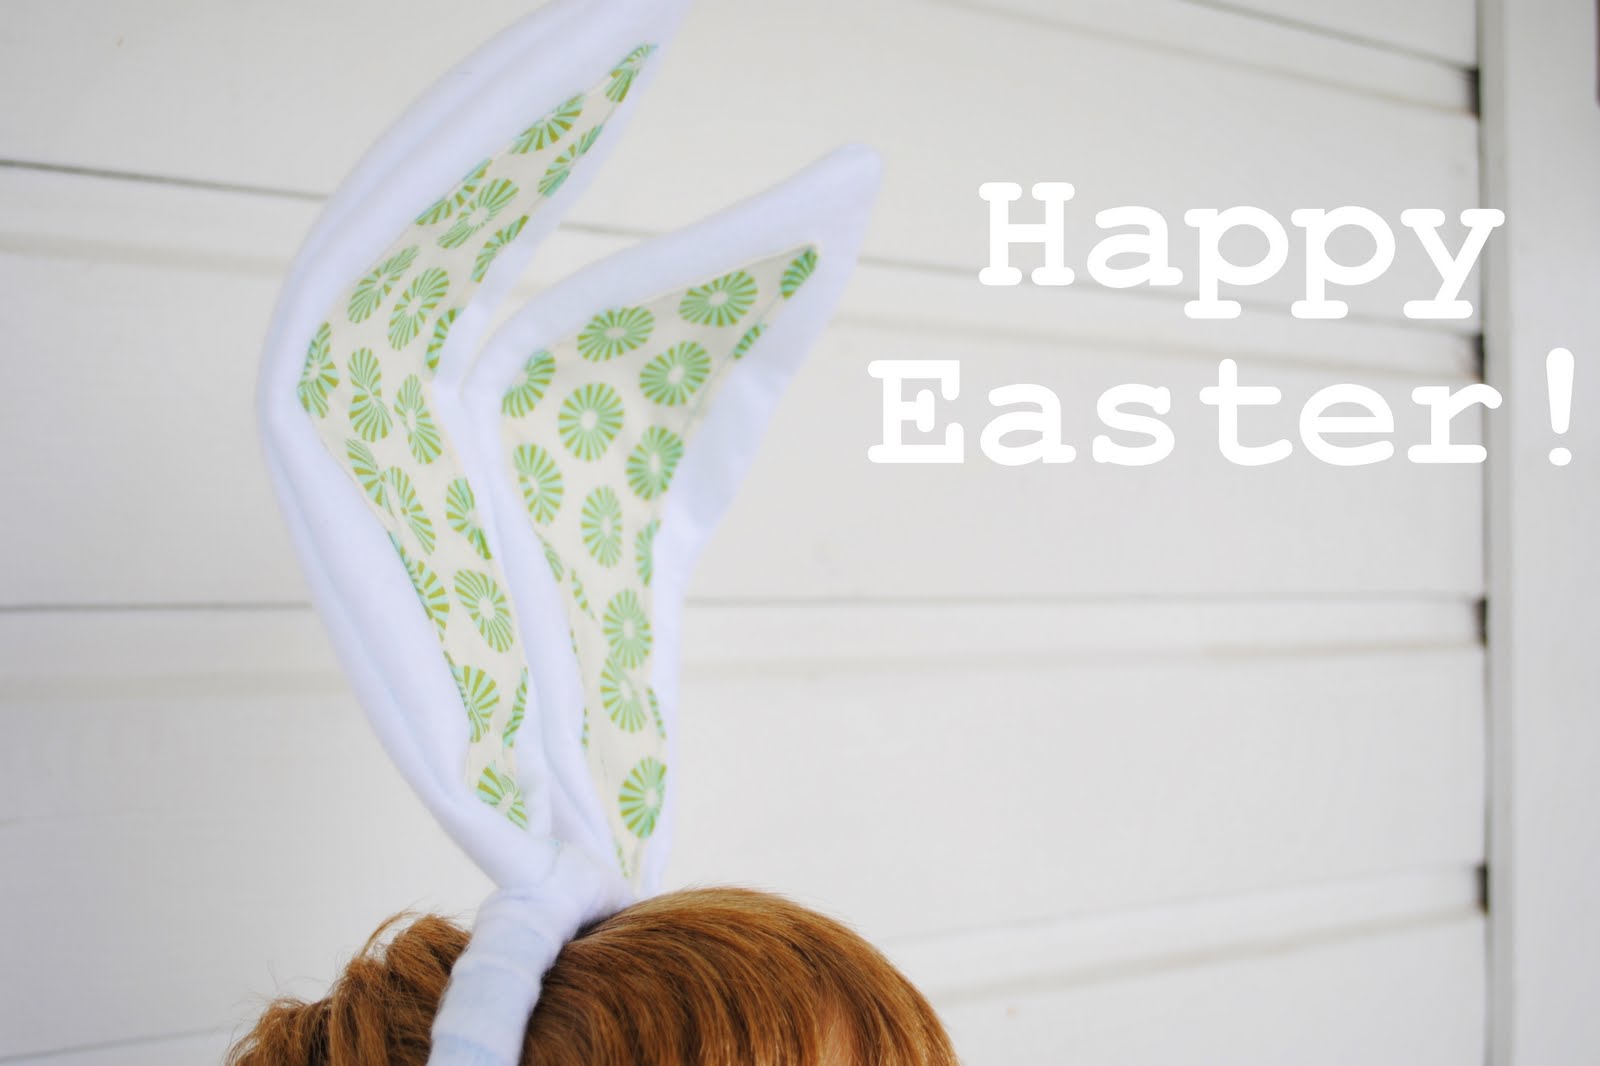
Easter is nearly here and I can't wait! We recently pulled out our Easter box and I found a pile of broken cheapo dollar store bunny ears from years past. As colorful as the pile was, I decided that it just would not do for my little men this year. Instead, I decided to make my own so that they could hunt for eggs in style. The project is so easy and very inexpensive. Here is what you'll need:
-Felt (I made eight with a yard and a half with plenty fabric to spare).
-Wire (Mine is 18 gage from Lowes).
-Fabric (Just big enough to cut two bunny ear inserts).
-Headband (The Dollar Tree has them for two for a dollar)
-Hot glue gun
First, cut four large bunny ear shapes out of your felt. I like my ears large and in charge, so I made mine 10 inches long (remember, you will be sewing them so add an extra little bit for seam allowance when cutting).

Cut two center ear pieces out of your chosen fabric (not pictured). I suggest cutting it about an inch narrower than the felt shapes. Next fold sides and iron.

Pin one piece of fabric to the center of one piece of felt. Sew along edges to hold in place.
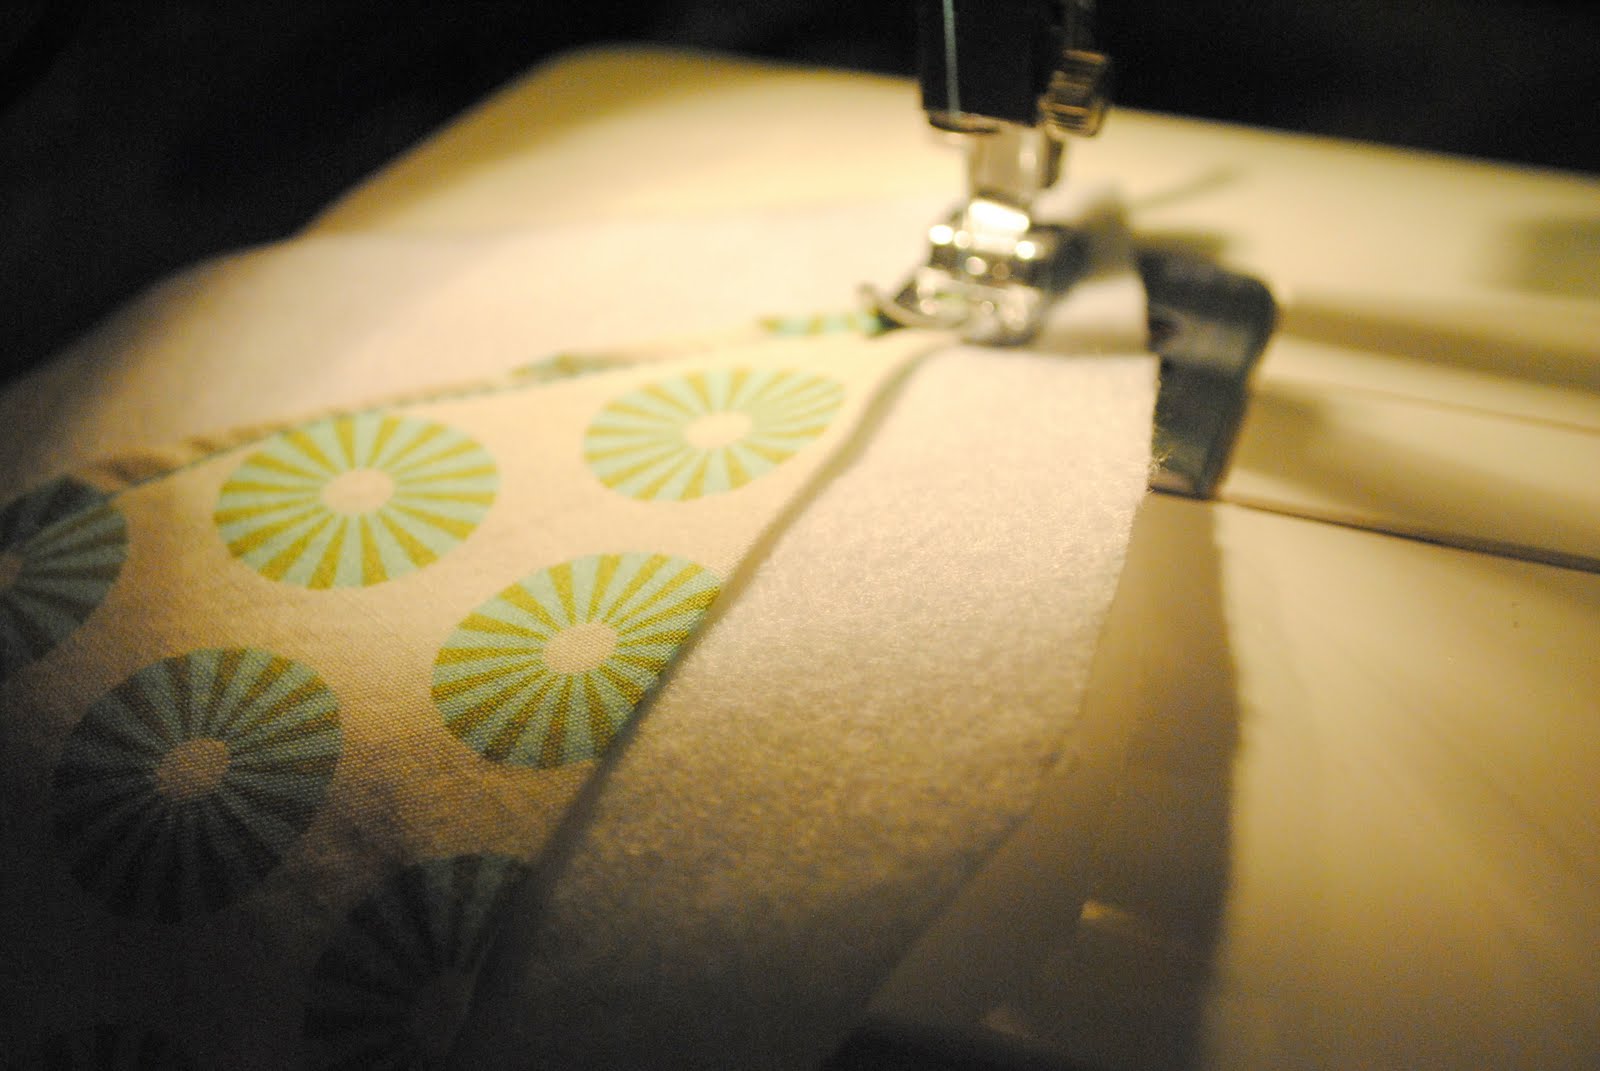
Once that is done, place your already sewn piece onto another felt cutout with the right side of your already sewn fabric facing in. Sew along the edges of entire ear. Repeat above steps on second ear.

Once done, your ears will look like this.

Turn ears right side out. Cut two pieces of wire long enough to encircle the full length and width of each ear (my ears were about 10 inches long and so I cut my wire about 23 inches). You want to make sure that you have enough wire so that about two inches stick out at the end). Take your hot glue gun and tack your wire in place. Then add a little bit of glue to the base of the front of each ear to hold ear closed and add a little shape.

Glue your ears to your selected spot on your headband. Once secure, wrap wire to hold them in place. Add more glue to make sure it doesn't wiggle.

Cut strips of felt about an inch in width and as long as your felt allows. Glue at an angle to an end of your headband. Wrap over the entire headband and double wrap where needed to cover wire and base of ears. Glue hear and there while you go to hold your felt in place.

All done! Now you are ready to go! Depending on how you like your ears worn, you can bend them any which way you please!

I hope this helped and that you have a wonderful Easter!


7 comments:
Love these!! I was actually just thinking yesterday that I need to get my little guy a pair of ears. Thanks for sharing :)
♥ the idea, hope you don't mind I shared it on my blog! ;) I'm soo going to make these for my kiddos and my siblings for this Easter hunt! I'm excited to see all my lil bunnies! :D
lovely idea, Malinda! The colors of spring and Easter make these ears so cheerful! Thanks for the tutorial!
"This blog serves as a constant source of inspiration for me. The author's ability to weave stories and draw life lessons from them is truly exceptional. I find myself reflecting on their words long after I've finished reading. Thank you for filling my life with wisdom and motivation."
high street voucher scheme
In the realm of character design and artistic expression, it's essential to find ways to unleash our creativity without feeling limited by financial constraints. Aintpayingfull signifies a resourceful approach, seeking alternative materials, techniques, and inspiration to create exceptional artwork while staying mindful of budgets.
https://www.aintpayingfull.com/promotions
Thank you for sharing your immense talent and for reminding us that true artistry is not confined by financial limitations. I eagerly look forward to your future creations and the insights you continue to provide through your blog.
http://frugalishness.com
I appreciate your blog on creating Homemade Bunny Ears for Easter. It's a fun and creative tutorial. For those looking to make this project even more budget-friendly, keeping an eye out for Promo Codes can lead to discounts on crafting supplies, making these adorable bunny ears an affordable Easter DIY. Thanks for sharing this delightful tutorial!
Post a Comment